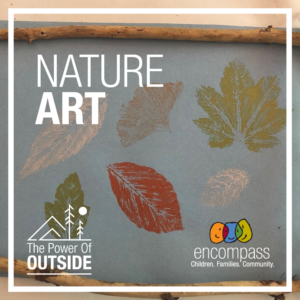
Nature Art
 Get creative – outside!
I have created and enjoyed art for as long as I can remember, from painting with mud as a young child to painting and making pottery as an adult. Not only is art fun, but there are also numerous developmental benefits for young children. It starts with exploration – touching and feeling the materials. Then it becomes a way of communicating and expressing themselves. And it promotes positive self-esteem as children gain skills that allow them to create works they are proud of.
Research has also shown that art can directly impact a child’s math, science, and literacy skills. When creating art, you can talk with your children about numbers (“Let’s count how many flowers you drew”), shapes (“That looks like a circle”), and size (“Which one is bigger?”). Mixing paint colors or sprinkling salt onto a watercolor painting to see what happens is an introduction to science. And creating pictures of stories they have heard or read can help improve a child’s comprehension as well as their visual and verbal creativity.
I also love being outdoors, almost no matter what the weather. Over the years, I have started blending these two passions. Since we know there are many developmental benefits to getting kids outside, as both a parent educator and art educator, I would like to share a few outdoor art project ideas with parents and caregivers:
 Nature Picture
What you’ll need:
- Assortment of items – I decided to make a picture of a vase of flowers and chose dandelions and a few other wildflowers. I also found a piece of bamboo stalk to use for a vase.
What you’ll do:
- Lay out your picture on your lawn, patio, deck, floor – anywhere you’d like.
- Take a picture of your creation, print, and frame!
The possibilities are endless! Kids can lay out items into simple shapes all the way to detailed designs or pictures. You can incorporate numbers and counting by allowing kids to pick a certain number of items. You can also look for shapes in the items chosen.
Nature Plaque
What you’ll need:
- Air dry or modeling clay or playdough
- Rolling pin
- Assortment of leaves, flowers, twigs – anything that can be pressed into the clay/playdough.
- Optional – tempera or watercolor paint
What you’ll do:
- Roll out the clay/playdough into a flat slab about ¼ – ½ inch thick.
- Lay out your items as desired.
- Gently press with a rolling pin – don’t overdo this or it will be difficult to remove the items.
- Add holes for hanging on the wall.
- Carefully remove items — this can be done right away or after it’s dried for a day or two.
- Allow to dry completely – this may take a few days depending on weather and humidity.
- Paint if desired.

Leaf Print
What you’ll need:
need:
- Leaves – for best results, use soft flexible leaves with plenty of veins
- Tempera or acrylic paint/paint brushes
- Paper
- Paper towels
What you’ll do:
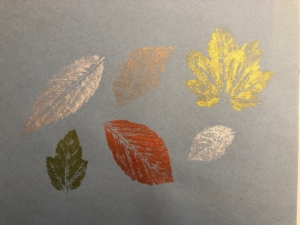
- Paint back of leaves – for best results, paint one at a time with a smooth thin layer of paint.
- Lay leaf paint-side-down on paper.
- Lay piece of paper towel over it and gently press and smooth – the paper towel absorbs any paint that might leak out the edges.
As you add leaves, be careful not to smudge the previous ones already printed.
Stick Frame
What you’ll need:
- 4 sticks
- Glue
- Yarn, ribbon, thread – anything to tie the corners
- Optional – tempera or acrylic paint
What you’ll do:
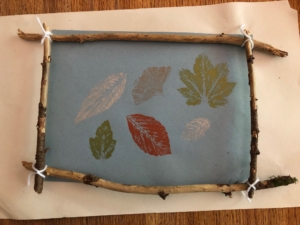
- Glue sticks together at the corners and let dry.
- Add color by painting if desired – this can be done before sticks are glued together or after they are glued and dry.
- Add ribbon, yarn, etc. by tying at the corners – this is optional, though adds embellishment and is a great way to teach your child how to tie.
Additional Resources:


